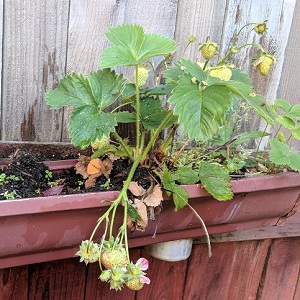
More strawberries in a smaller space, with less bending, less pest trouble, and less effort — that’s the promise of a wooden strawberry pyramid planter, and it’s one they actually deliver on.
While you can stack plastic landscape edging into circular tiers or buy prefab plastic strawberry towers, a well-built wooden pyramid gives you the best combination of durability, drainage, and growing space. Wood breathes, which helps regulate soil moisture and temperature. It’s easy to customize to whatever size fits your yard. And honestly, a cedar or redwood strawberry pyramid just looks better sitting in your garden than a stack of plastic.
In this guide, I’ll walk you through everything you need to know to build and grow a productive wooden strawberry pyramid — from choosing the right lumber and planning your irrigation, to filling it with the right soil mix, fertilizing for maximum berry production, and keeping your plants healthy season after season. Whether you’ve got a small patio or a full backyard, a strawberry pyramid is one of the best ways to grow a ridiculous amount of strawberries in a surprisingly small footprint.
Why Build Strawberry Pyramid Planters
Strawberry pyramids are not only a decorative item in your garden, but let you grow more strawberries in a smaller space, while reducing the amount of work you have to do, and saves you having to get down on your knees. Additionally, there are other benefits such as being easier to keep pest free that make strawberry pyramids a great addition to your garden. We will explore these and more below.
Strawberry Pyramids Maximize Space
In small yards and urban spaces, you have to squeeze as much growing area in as possible. Strawberry pyramids make the most of a small space by going up, they gain access to higher densities of plantings in a smaller footprint.
Effortless Access: Harvest with Ease
Whether you are lazy like me, or have bad knees and don’t want to get down on the ground to harvest your strawberries, strawberry towers and pyramids are the ideal solution. The raised beds make it easier to tend to and pick your strawberries.
Pest-Free Strawberries: Elevated Security
In my experience, strawberries have two main garden pests to worry about, slugs and birds. If you wrap the base of your strawberry pyramid with copper tape, it will dissuade slugs from going after your strawberries, and getting them up off the ground makes them easier to patrol for offenders that sneak in.
As for birds, the shape of strawberry pyramids makes it easy to drape bird netting over, protecting them from getting raided before you can enjoy them!
Choosing the Right Wood for Your Strawberry Pyramid Planter
When it comes to building a strawberry pyramid that will last and that looks good, you really have three wood choices, and plastic to decide between.
Cedar Strawberry Pyramids
Cedar is a go-to favorite building material for gardeners due to its lightweight and rot resistance. The oils in cedar that give it its signature smell also help preserve the wood against rot and insects. The only thing to consider is that some people are allergic to it, so take care when sawing or sanding it.
Redwood For Strawberry Pyramids
Another excellent wood for making planters like strawberry pyramids is redwood. A soft wood like cedar, redwood gets its rot and insect resistance from the high levels of tannins in its wood. Unfortunately, much like cedar, it will quickly lose its signature color when left exposed to the elements.
Think Twice About Pressure Treated Wood
While pressure treated wood is readily available and generally a cheaper option than cedar or redwood, you will probably want to avoid using it for planters. The reason for this is that to make the wood bug and rot resistant, they have to inject it with a cocktail of toxic chemicals. Over time, those chemicals can leach out into the soil around them, into your strawberry plants, and ultimately into you.
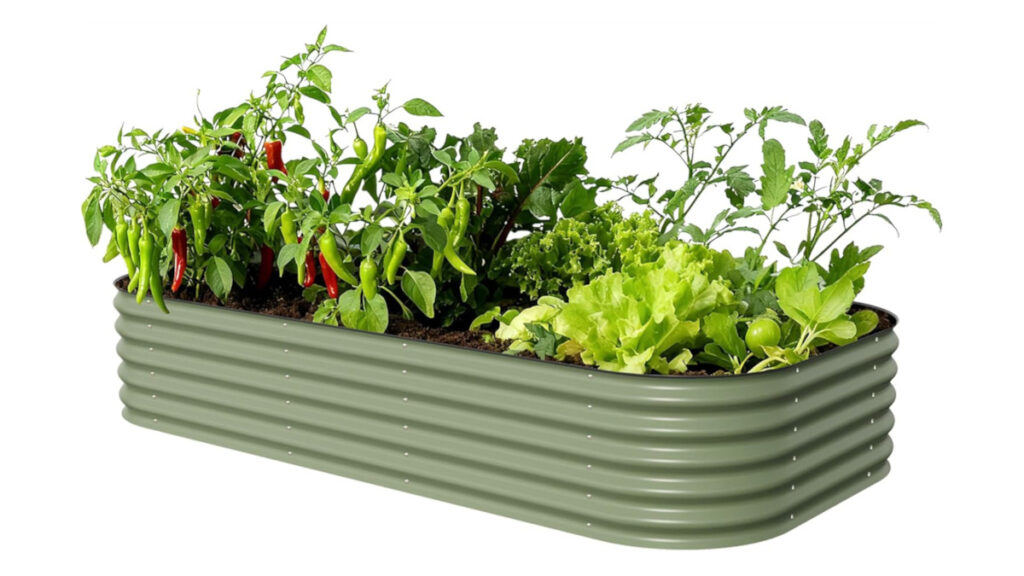
Using Plastic For Your Strawberry Pyramid
To be realistic, using a plastic edging to make a stack of discs, each smaller than the other one below it, isn’t truly making a strawberry pyramid, but it does achieve the same effect. If you want a circular design for aesthetic reasons, this may be a good choice for you, though while I haven’t tried building one this way, I suspect that they are more prone to settling weird than other types of strawberry pyramids.
What You Need to Build One
Once you’ve settled on cedar or redwood, here’s what to have on hand before you start cutting.
Lumber: For a standard three-tier pyramid on a 4×4 foot base, cedar fence pickets are the most economical starting point — they’re already cut to consistent widths, rot-resistant, and widely available. If you want thicker walls for a larger build, 2×6 cedar boards give you more structural depth and a cleaner finished look.
Screws: Don’t use standard wood screws on an outdoor planter — they’ll rust and stain the wood within a season. Exterior-rated deck screws are corrosion resistant and hold up to years of wet soil contact without backing out.
Pocket screw jig: If you want clean, tight joints without the frustration of trying to drill straight through end grain by hand, a pocket screw jig is worth every penny. It’s one of those tools you’ll wonder how you managed without once you’ve used it once. If you go this route, be sure to get exterior rated pocket screws to go with it!
Miter saw: The bevel cuts on a proper pyramid aren’t difficult, but they do require a saw that can handle angle cuts accurately. A compound miter saw makes quick work of repeated angle cuts and pays for itself the first time you build something that actually fits together square.
Sandpaper or orbital sander: Cedar splinters. Give all your cut edges a quick pass with 120-grit sanding blocks before assembly, especially on any tier edges where you’ll be reaching in to plant and harvest.
How Many Strawberry Plants Fit in a Pyramid?
One of the biggest advantages of a strawberry pyramid is just how many plants you can cram into a small footprint. A standard three-tier pyramid built on a 4×4 foot base can easily hold 20 to 25 plants, while larger designs with more tiers can accommodate 50 or more. A tall six-tier tower like the Fine Gardening design can hold up to 90 plants in a space that would otherwise require 60 feet of traditional row planting.
The general rule for spacing strawberries in a pyramid is to plant them about 8 to 10 inches apart, measured from center to center. This gives each plant enough room to develop a healthy root system and good air circulation between the foliage, which helps prevent fungal diseases. Resist the temptation to pack them in tighter — crowded plants produce smaller berries and are more prone to problems.
On the lower tiers where you have more planting width, you can often fit two staggered rows of plants. On the upper tiers where space gets tighter, a single row along the outer edge is usually all you’ll have room for, and that’s fine. The top tier of most pyramids only has room for two or three plants.
One thing to keep in mind is that strawberry plants produce runners — long stems that reach out and try to root new daughter plants. In a pyramid, there’s not a lot of extra space for these to go, and they sap energy from the mother plant that could be going toward fruit production. Get in the habit of snipping runners off as they appear, at least for the first couple of years. If you want to propagate new plants from them later, you can pot up the runners separately rather than letting them crowd your tiers.
If you’re starting with a brand new pyramid full of fresh plants, it’s also worth noting that you should pinch off all flowers during the first growing season. I know it’s painful when you’re eager for berries, but this forces the plants to put all their energy into establishing strong root systems. You’ll be rewarded with significantly bigger harvests in year two and beyond.
Best Strawberry Varieties for Pyramid Planters
Not all strawberries are created equal, and the variety you choose for your pyramid will have a big impact on how much fruit you get and how much maintenance you’ll deal with. There are three main types of strawberries, and each behaves differently in a tiered planter.
Day-Neutral Strawberries — The Best Choice for Pyramids
Day-neutral varieties are the top pick for pyramid planters. These plants produce fruit continuously throughout the growing season regardless of day length, giving you a steady supply of berries from early summer right up to the first frost. They also tend to stay compact, produce fewer runners than other types, and — this is the big one — they’ll give you fruit in their very first year. That means no agonizing wait to enjoy the fruits of your labor.
Some of the best day-neutral varieties for pyramids include Albion, which is known for its large, sweet berries and disease resistance; Seascape, a heavy producer that handles heat well; and Tristar, which is reliable, cold-hardy, and does great in smaller spaces.
Everbearing Strawberries — A Solid Runner-Up
Everbearing varieties produce two to three flushes of fruit per year, typically in early summer, late summer, and early fall. They don’t fruit quite as continuously as day-neutrals, but they produce few runners, which makes them much easier to manage in the tight quarters of a pyramid planter. Quinault is a popular everbearing choice — it produces large, soft, sweet berries and adapts well to container and raised planter situations. Ozark Beauty is another reliable option that’s been a favorite with home gardeners for decades.
June-Bearing Strawberries — Use with Caution
June-bearers produce one big harvest in late spring or early summer, and while those berries tend to be the largest of the three types, these varieties come with some drawbacks for pyramid growing. They produce aggressive runners that will try to take over every available inch of space, and they won’t give you any fruit until their second year. They can work in a pyramid, but you’ll spend a lot more time managing runners and you’ll only get that one concentrated harvest window. If you go this route, just be prepared to stay on top of runner removal.
A Word on Mixing Varieties
One of the nice things about a multi-tiered pyramid is that you have enough room to plant more than one variety. Putting a day-neutral or everbearing variety on most of your tiers gives you a long harvest season, and if you want, you can dedicate one tier to a June-bearer for a burst of large berries in early summer. Just keep the June-bearers on a lower tier where they have a bit more room, since they tend to be more vigorous growers.
Planting Your Strawberry Pyramid
You’ve built your pyramid, filled it with soil, and maybe even run your drip irrigation lines. Now comes the fun part — getting plants in the ground. The process is straightforward, but there are a few details that make the difference between a pyramid that thrives and one that struggles.
When to Plant
The best time to plant your strawberry pyramid is in early spring, as soon as the soil is workable and has warmed enough to easily push a trowel into it. Strawberries are tough plants that can handle cool spring weather, and getting them in early gives their root systems time to establish before the heat of summer. If you miss the spring window, you can also plant in late summer or early fall — this gives the plants time to settle in before winter and sets you up for a strong harvest the following year.
Bare Root vs. Potted Plants
You’ll generally find strawberry plants sold two ways: bare root crowns and potted nursery starts. Both work fine in a pyramid.
Bare root plants are cheaper, easier to ship, and are what most mail-order nurseries sell. They’ll arrive looking like sad little bundles of brown roots with a stubby crown on top — don’t worry, that’s normal. Before planting, soak the roots in water for one to two hours to rehydrate them. If the roots are excessively long, trim them back to about four to five inches so they’ll fit in the planting hole without bending or curling.
Potted nursery starts from your local garden center are a bit more expensive but give you a head start since they’re already actively growing. Before planting, gently loosen the root ball, especially if the roots are circling around inside the pot.
Getting the Crown Depth Right
This is the single most important detail when planting strawberries, and it’s where a lot of people run into trouble. Every strawberry plant has a crown — the thick, stubby center where the roots meet the leaves. The crown needs to sit right at soil level. Not above it, not buried below it.
If you plant too deep and bury the crown, it will rot. If you plant too shallow and the crown sits up above the soil, the roots will dry out and the plant will struggle. You want the top of the crown flush with the surface, with all the roots fully buried beneath.
After setting each plant, firm the soil gently around the roots to eliminate air pockets and give the plant a thorough watering to help settle everything in.
Working Your Way Up the Pyramid
When planting a multi-tiered pyramid, start from the bottom tier and work your way up. Fill and plant each level before moving to the next. This keeps the soil from shifting around as you work on the tiers above.
On the lower tiers where you have more planting width, you can stagger two rows of plants. On the narrower upper tiers, a single row along the outer edge works best. Give each plant about 8 to 10 inches of space, and angle the crowns slightly toward the outside edge of each tier. This encourages the plants to grow outward and cascade over the sides, which looks great and makes harvesting easier.
After Planting
Once everything is planted, water the entire pyramid thoroughly. If you’ve installed drip irrigation, run the system and check that each tier is getting adequate moisture. Then add about two inches of straw mulch around the plants, keeping it pulled back slightly from each crown.
And here’s the hardest part for new growers: if you’re planting day-neutral or everbearing varieties, pinch off the first flush of flowers that appear. For June-bearers, pinch off all flowers for the entire first growing season. This feels brutal when you’re eager for strawberries, but it forces the plant to invest all its energy into building a strong root system. The payoff is significantly larger and more productive plants in year two and beyond.
Watering Your Strawberry Pyramid
While you are in the planning stages of your strawberry pyramid, it is a good idea to give some thought to watering it. This is one area where a little planning up front saves you a lot of headaches later, especially since strawberry pyramids dry out faster than in-ground beds due to the increased exposure to sun and wind on all sides.
How Much Water Do Strawberries Need?

Strawberries are thirsty plants with shallow root systems, which means they need consistent moisture but absolutely hate sitting in waterlogged soil. As a general rule, strawberry plants need about 1 to 1.5 inches of water per week during their growing season. When they’re flowering and producing fruit though, that demand goes up to about 2 inches per week, especially during hot, dry weather.
The tricky part with a pyramid planter is that the upper tiers are going to dry out significantly faster than the lower ones. The smaller soil volume, combined with more wind and sun exposure, means you could easily find the top level bone dry while the bottom is still moist. So you’ll want to check moisture levels on each tier individually rather than assuming the whole pyramid needs the same amount of water.
A simple way to check is to stick your finger about two inches into the soil. If it feels dry at that depth, it’s time to water. If you want to take the guesswork out of it, a cheap soil moisture meter is worth the few bucks it costs and will keep you from over or under watering.
When to Water
Water your strawberry pyramid in the early morning whenever possible. This gives the plants time to dry out before evening, which is important because wet foliage overnight is an open invitation for fungal diseases like gray mold and leaf spot. Strawberries are particularly susceptible to rot when their leaves and fruit stay damp for extended periods.
During the peak of summer, you may need to water every two to three days, or even daily for the upper tiers if temperatures are consistently high. In cooler weather, twice a week is usually sufficient, but always let the soil be your guide rather than sticking to a rigid schedule.
One good tip is to just set your irrigation on a timer. This reduces the risk of over or underwatering, at least once you have it tuned in. But do remember to check the moisture levels regularly throughout the year as summer winds and spring rains will affect how often and for how long you need to run your irrigation. This is one item to start big with. A 4-hose digital irrigation controller for garden hoses, lets your run multiple hoses or irrigation systems from one point and each can be set for their own frequency. This is clutch when you have plants with differing watering needs!

Drip Irrigation and Soaker Hoses
The easiest and most effective way to water your strawberry pyramid is with soaker hoses or drip irrigation. These deliver water directly to the soil and root zone, keeping the leaves and fruit dry. This alone will cut down on a lot of the fungal problems that plague strawberry growers.
If you want to go with drip irrigation or soaker hoses, it is easiest to plan and install them before you fill your strawberry pyramid with soil. That way you can run your main supply line up the center of your tower and then run lateral lines out to each tier. Position your drip emitters or soaker hose about two inches from the base of each plant for the best coverage.
One thing to consider is that each tier may need a different amount of water. If you’re handy with drip irrigation, you can install adjustable emitters or use different emitter spacing on each level, with closer spacing on the upper tiers where the soil dries out fastest. Hooking the whole system up to a battery-powered hose timer takes the daily chore of hand watering completely off your plate.
Hand Watering Tips
If you’d rather keep things simple and water by hand, that works fine too. Just make sure you water at the base of the plants and try to keep the water off the leaves and berries. Water slowly and deeply rather than giving it a quick splash. You want the water to soak down into the root zone, not just wet the surface and run off the sides of your pyramid.
A watering wand with a gentle shower head attachment works well for this, as it lets you control the flow and get water exactly where you need it without blasting soil everywhere.
Mulch to Retain Moisture
Regardless of how you water, adding a layer of straw or other organic mulch around your strawberry plants will help retain moisture, reduce how often you need to water, and keep the berries clean. About two inches of mulch is the sweet spot. Just keep it pulled back slightly from the crown of each plant to prevent rot.
The Perfect Soil For Your Strawberry Pyramid
Once you have built a strawberry pyramid, the big question is what soil to fill it with. Regular old dirt is not a good choice as it will pack tight, not drain well, and not give you very good results. Strawberries like deep, sandy loam soil rich in organic matter that drains easily.
Where to Find the Ingredients
All four components of the soil mix are available at most garden centers, but if you’re ordering online or want specific recommendations, here’s what to look for:
Garden soil or topsoil (40%): A bagged quality garden soil gives you a consistent, weed-free base without the guesswork of using yard dirt that may be compacted or carrying pests. Miracle-Gro and Espoma both make reliable options that are widely available.
Compost (30%): Homemade compost is ideal if you have it. Avoid anything labeled “garden soil” that’s really just compost filler in disguise — check the bag for actual compost content.
Perlite (20%): This is the ingredient most people skip and then wonder why their soil compacts into a brick by midsummer. Perlite keeps the mix light and aerated so water moves through cleanly instead of pooling around the roots. An 8-quart bag is enough for a small to medium pyramid — go with a larger bag if you’re building multiple tiers or a large base.
Peat moss (10%): Peat moss holds moisture without waterlogging and nudges your pH toward the slightly acidic range strawberries prefer.
One more thing worth grabbing: Before you fill your pyramid, spend two minutes checking the pH of your finished mix with a $10 soil pH meter. Strawberries are particular about pH and a reading outside the 5.5 to 6.5 range will show up as slow growth and small fruit all season. Adjust with garden lime if you’re running too acidic, sulfur if you’ve drifted too alkaline. It’s the kind of thing that’s easy to check upfront and a real headache to diagnose after your plants are already struggling.
Protecting Your Strawberry Pyramid From Slugs
Slugs are the number one pest problem for strawberry growers, and if you’ve ever walked out to your pyramid in the morning to find your ripening berries riddled with holes, you know exactly how frustrating they are. The good news is that a pyramid planter actually gives you a structural advantage over in-ground beds — you just need to use it.
Why Pyramids Help (But Aren’t Slug-Proof)
Growing strawberries up off the ground means slugs have to climb to get to your berries, and the drier soil surface on a well-drained pyramid is less inviting to these moisture-loving pests than a ground-level bed. But slugs are persistent, and they will climb wood. So you need a few extra lines of defense.
Copper Tape — Your Best Weapon
Copper tape is the single most effective slug deterrent for a pyramid planter, and the shape of a pyramid makes it easy to apply. When a slug’s mucus contacts copper, it creates a mild electrical reaction that’s uncomfortable enough to make them turn around. It’s chemical-free, lasts for years, and once it’s on, you don’t have to think about it.
Apply adhesive-backed copper tape — at least two inches wide — in a continuous strip around the outside of each tier’s frame, a couple of inches above ground level on the bottom tier. The key is making sure there are no gaps or breaks in the strip. Overlap the ends slightly where they meet so there’s no opening for a slug to slip through. Also make sure no leaves or stems are hanging down past the copper strip to the ground — slugs will use those as a bridge right over your barrier.
Check the tape a couple of times during the season to make sure dirt or debris hasn’t built up on it, which can reduce its effectiveness. A quick wipe with a damp cloth is all it takes to keep it working.
Other Methods That Help
Copper tape does the heavy lifting, but combining it with a few other practices makes your pyramid even more slug-resistant:
Keep it tidy. Slugs hide during the day under debris, dead leaves, and thick mulch. Keep the area around the base of your pyramid clean. If you’re using straw mulch on the tiers themselves, keep it to a thin layer during slug season — thick mulch is basically a slug hotel.
Water in the morning. Slugs are most active at night and thrive in damp conditions. Watering early in the day lets the soil surface dry out before evening, making your pyramid less appealing to them.
Beer traps. Bury a shallow container near the base of your pyramid and fill it with cheap beer. Slugs are attracted to the yeast and will crawl in and drown. It’s not pretty, but it works. Empty and refill every couple of days.
Iron phosphate bait. Products like Sluggo are organic, pet-safe, and effective. Scatter the pellets around the base of your pyramid as a perimeter defense. Reapply after heavy rain.
Night patrol. If you’re dealing with a serious slug problem, go out with a flashlight after dark and pick them off by hand. Early morning works too. It’s the least glamorous method, but it’s surprisingly effective when combined with the other approaches.
What About Diatomaceous Earth and Eggshells?
You’ll see these recommended frequently, and while they can provide some deterrent effect, they’re not as reliable as copper or iron phosphate. Diatomaceous earth loses its effectiveness the moment it gets wet, which is a problem in any garden that gets watered or rained on. Crushed eggshells are a mild deterrent at best — slugs can and will crawl over them if they’re motivated enough. Neither one would be my primary defense, but they don’t hurt as an extra layer if you have them on hand.
Fertilizing Your Strawberry Pyramid
Plants need food too, and strawberries are hungrier than you might think. That said, they’re also surprisingly sensitive to over-fertilization, especially too much nitrogen. Getting the balance right is the difference between a pyramid loaded with sweet berries and one that’s all leaves and no fruit.
What Strawberries Need
Strawberry plants require three primary nutrients: nitrogen (N), phosphorus (P), and potassium (K). Nitrogen drives leafy green growth, phosphorus supports strong root development and flowering, and potassium is the big one for fruit quality — it promotes bigger, sweeter, firmer berries. This is why strawberry-specific or berry fertilizers tend to be higher in potassium than nitrogen.
A balanced organic fertilizer like 10-10-10 works well as a general option. If you can find an organic berry fertilizer like Espoma Berry-tone or Dr. Earth Organic Berry Fertilizer, even better — these are formulated with the nutrient ratios strawberries actually prefer and include beneficial trace minerals like boron, calcium, and magnesium that contribute to healthy plants and better fruit.
When to Fertilize Your Strawberries
Timing matters more than most people realize with strawberries, and this is where a lot of backyard growers make a common mistake: fertilizing in the spring right before their plants fruit.
Here’s why that’s a problem. Nitrogen encourages fast, vigorous leaf growth. If you hit your strawberry pyramid with fertilizer in the spring just as it’s gearing up to produce fruit, you’ll end up with lush green foliage at the expense of berries. The fruit you do get tends to be softer, more susceptible to disease, and lower quality. University extension services across the country consistently recommend against spring nitrogen applications for this reason.
Instead, here’s a better fertilizing schedule for your strawberry pyramid:
At planting: When you first fill your pyramid with soil, mix in a balanced organic slow-release fertilizer according to the package directions. This gives your new plants the nutrients they need to establish strong root systems.
After the final harvest: This is the most important feeding of the year. Once your plants are done producing fruit (late June or July for June-bearing varieties), fertilize again. This is when the plants are recovering from fruiting and beginning to set the flower buds that will become next year’s berries. The nitrogen that would be harmful in spring is exactly what they need at this stage to rebuild and prepare for the following season.
Late summer: A light application in August helps plants build energy reserves heading into dormancy. Don’t fertilize after the end of August though — late nitrogen encourages new tender growth that won’t have time to harden off before winter, leaving your plants vulnerable to cold damage.
Pyramid-Specific Considerations
One thing to keep in mind with a strawberry pyramid is that nutrients leach out of raised and tiered planters faster than they do in ground-level beds. Every time you water, some of those nutrients wash down and out, especially on the upper tiers with their smaller soil volumes. This means your pyramid may need a bit more attention than a traditional strawberry patch.
A slow-release organic fertilizer is your best friend here because it breaks down gradually over weeks rather than dumping all its nutrients at once where they can wash away. You can also supplement with a diluted liquid fertilizer like fish emulsion or liquid kelp every few weeks during the growing season to keep nutrient levels steady. Just use it at half strength to avoid overdoing it — remember, strawberries are sensitive to too much of a good thing.
Signs Your Strawberries Are Hungry (or Overfed)
Learning to read your plants will tell you more than any fertilizing schedule. Pale green or yellowing leaves, especially on older growth, often indicate a nitrogen deficiency. Small fruit and weak growth can point to a lack of phosphorus or potassium.
On the flip side, if your strawberry pyramid is producing tons of dark green leaves but very few flowers or berries, you’ve likely been too heavy-handed with nitrogen. Dial it back and let the plants redirect their energy toward fruiting. Soft, mushy berries that rot quickly can also be a sign of excess nitrogen.
When in doubt, a simple soil test kit from your local garden center or county extension office will take the guesswork out of it entirely and tell you exactly what your soil needs.
Winterizing Your Strawberry Pyramid
If you live anywhere that gets freezing temperatures, winterizing your strawberry pyramid is essential. Skip this step and you risk losing your plants entirely — and all the work you put into getting them established.
Here’s why pyramids need extra attention: the soil in a raised, tiered planter gets significantly colder than soil in the ground. The exposed sides of each tier lose heat to the surrounding air on multiple surfaces, while in-ground beds benefit from the earth’s natural insulation. University extension sources note that raised beds and pyramids can run about 5 degrees colder than ground-level plantings, which is enough to make the difference between plants that survive winter and plants that don’t.
Strawberry crowns can be killed when temperatures drop below about 15 to 20°F, and even before it gets that cold, repeated freeze-thaw cycles can heave plants right out of the soil, tearing roots and exposing crowns to drying winter air.
When to Mulch
Timing matters. You don’t want to mulch too early — the plants need a chance to harden off and acclimate to cool fall temperatures before you tuck them in for winter. Mulching too soon can actually make them more susceptible to cold damage, not less. Wait until your plants have experienced several hard frosts and nighttime temperatures are consistently in the mid to upper 20s. For most areas, this means sometime in November, though your exact timing will depend on your climate zone.
You can tell your plants are approaching dormancy when the leaves lose their vibrant green color and take on a grayish or reddish tint, and the plants visibly flatten out against the soil.
How to Mulch a Strawberry Pyramid
Clean, weed-free straw is the go-to mulching material for strawberries — and yes, that’s probably where the name “strawberry” comes from. Wheat straw, oat straw, or soybean straw all work well. Chopped cornstalks are another good option.
Avoid using leaves. They mat together when wet, trap moisture against the crowns, and create conditions that promote rot rather than prevent it. Hay is also a poor choice because it’s loaded with weed seeds that will cause problems come spring.
For a pyramid planter, you’ll want to apply 6 to 8 inches of straw — thicker than the 3 to 5 inches recommended for in-ground beds, because of that extra cold exposure on all those raised surfaces. Make sure you cover the tops and sides of each tier thoroughly. In windy areas, lay chicken wire over the straw and anchor it with bricks or stakes to keep it from blowing away.
Spring Uncovering
In the spring, resist the urge to pull the mulch off too early. Removing it in March might encourage your plants to bloom before the danger of late frost has passed, and a single freeze can wipe out those first flowers — which are the ones that produce the biggest berries. Instead, periodically check under the straw and wait until about 25 percent of your plants are showing new growth before you start pulling it back.
When you do remove the mulch, don’t throw it away. Tuck it around the base of your plants and between tiers to serve as growing-season mulch. It’ll suppress weeds, retain moisture, and keep ripening berries clean. And keep some straw nearby in case a late frost threatens — you can quickly heap it back over your plants for a night or two of emergency protection.
Maintaining Your Pyramid Soil Over Time
A strawberry pyramid isn’t a set-it-and-forget-it situation when it comes to the soil. Over the course of a growing season, the soil in your pyramid will settle, compact, and lose nutrients — and this happens faster in a tiered planter than it does in a traditional garden bed. The smaller soil volumes, frequent watering, and increased drainage all contribute to nutrients leaching out more quickly.
Each spring before your plants break dormancy, take some time to assess and refresh the soil in your pyramid. You’ll likely notice that the soil level has dropped an inch or two from where it was when you first filled it. Top-dress each tier with a half-inch to one-inch layer of quality compost, gently working it into the surface around your plants without disturbing the roots. This replenishes organic matter, reintroduces beneficial microorganisms, and improves the soil’s ability to hold both moisture and nutrients.
Every couple of years, it’s worth checking the pH of your soil as well. Strawberries prefer a slightly acidic pH of 5.5 to 6.5, and over time, regular watering and fertilization can shift the pH outside that range. A simple test kit from your garden center will tell you where things stand, and you can adjust with lime if it’s gotten too acidic or sulfur if it’s drifted too alkaline.
Strawberry plants themselves have a productive lifespan of about three to four years before they start declining in vigor and fruit production. When you notice your harvests getting smaller and the plants looking tired, it’s time to replace them with fresh stock. This is also a great opportunity to pull out all the old soil, refresh the mix in your pyramid, and start a new cycle. If you’ve been propagating runners in pots on the side, you’ll have free replacement plants ready to go.
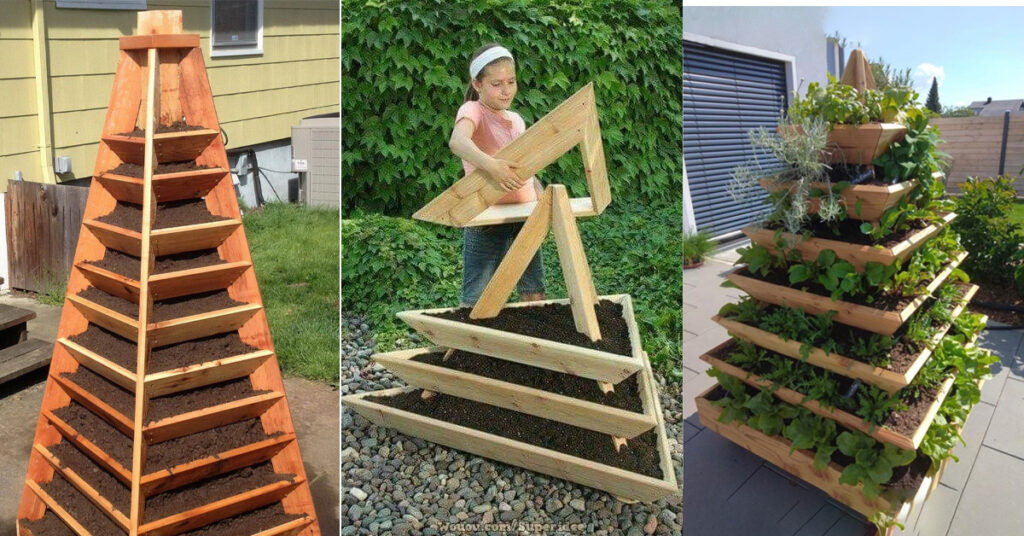
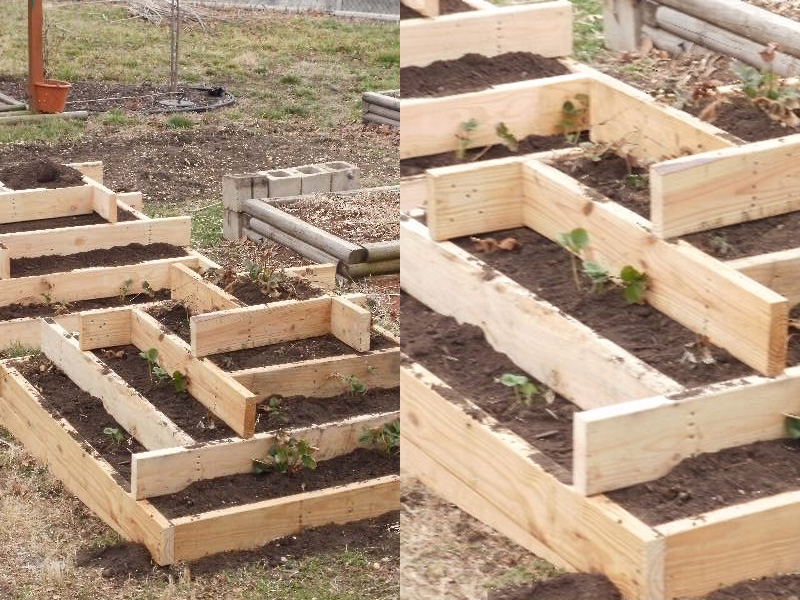
Examples Of Strawberry Pyramids
Here are some examples of the many styles and forms of strawberry pyramids that people have built. When it comes down to design, it really is a matter of how complex you want to make it and how good your woodworking skills are. Simple stacks of boxes are extremely easy, while pyramids of double bevel cut cedar take a little more time and skill.
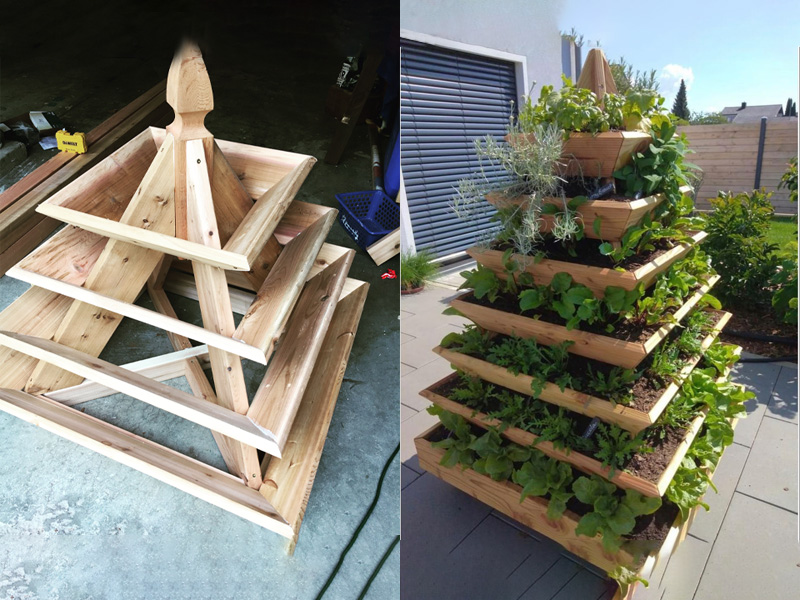
Photo Credit: Perrenial Genes and Shellie Gainerhttps://www.pinterest.com/shelliegainer/
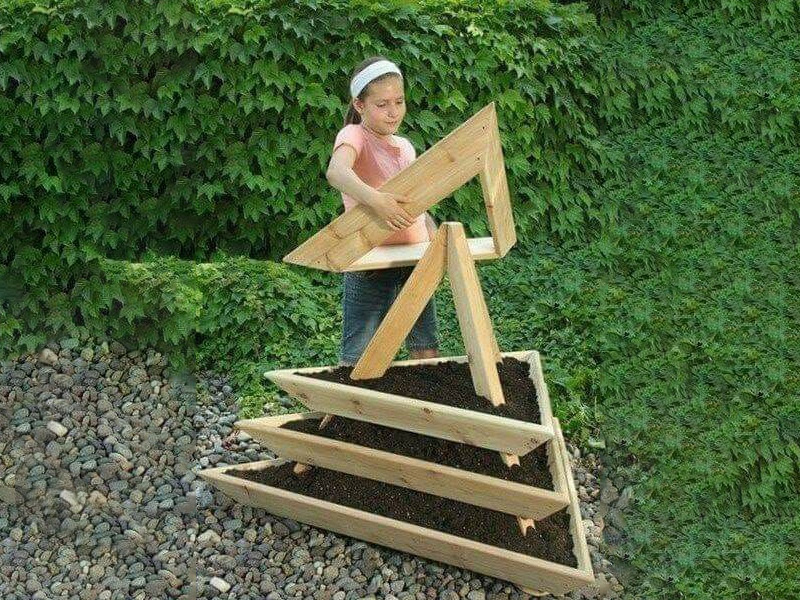
Photo Credit: Unknown
This is what I’d call a medium difficulty strawberry pyramid. There are some double bevels to cut, but not as many as some of the more complex plans. Once you have your compound miter saw set (Amazon link), this would be relatively quick to build.
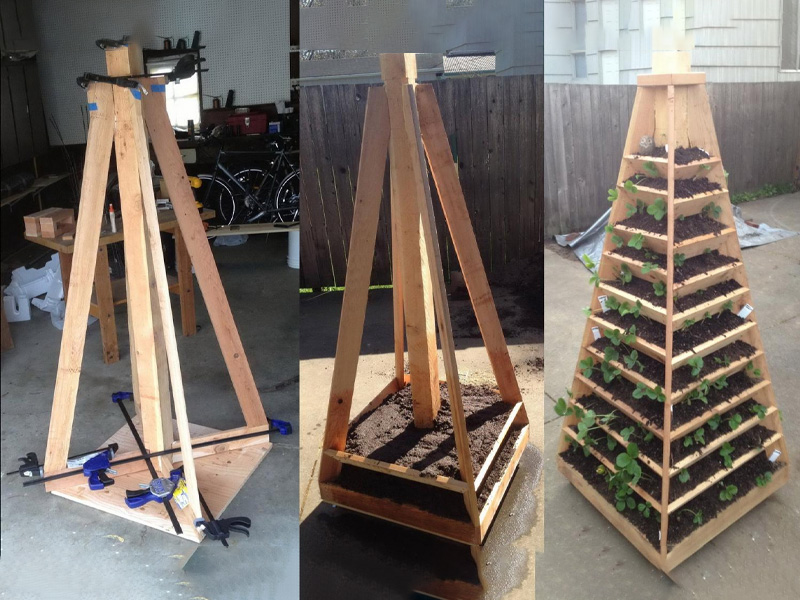
Photo Credit: Remove and Replace
Speaking of more complicated, this tall strawberry pyramid really crams a lot of growing area in to a small space. Definitely is a lot more cutting and woodworking though than some of the other styles of strawberry planters.
Photo Credit: Remove and Replace
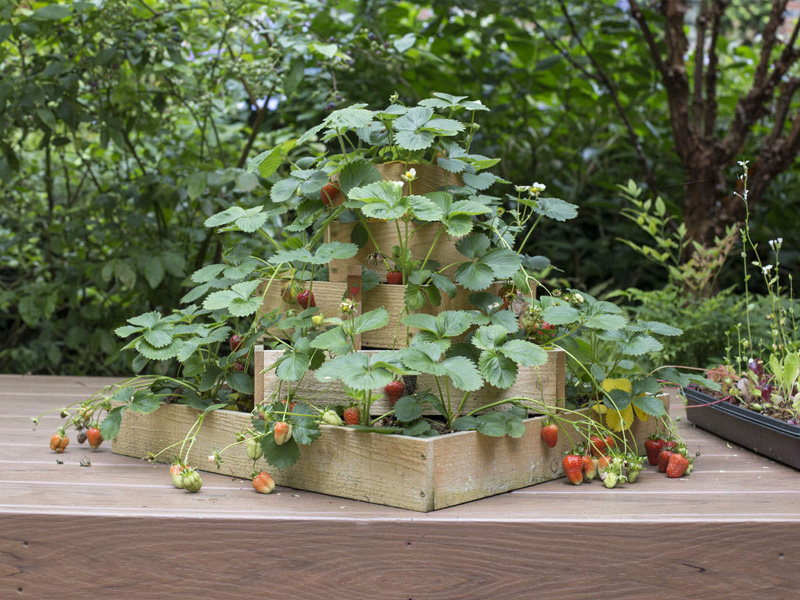
Photo Credit: Dunn Lumber
A table top strawberry pyramid? Why not? You could also take this general design and scale it up to about as large as you want.
If you want a simple strawberry pyramid, just do a quick build like this one. Made from 2×6 lumber and just butt joined together with screws, I’m betting you could have this up in about an hour.
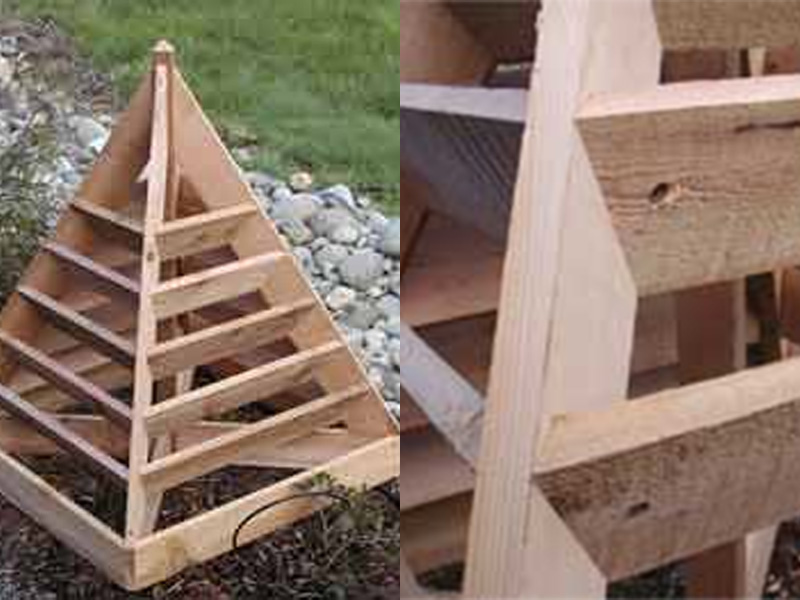
Photo Credit: RunnerDuck
Another relatively easy to build strawberry pyramid, this one uses primarily 1″ x 4″ cedar fence boards for its construction. This seems like a fun weekend project for the winter when it is too nasty to be outside working in the garden. Only change I would make would to use a pocket screw jig (Amazon Link) instead of trying to drill all those screw holes by hand.
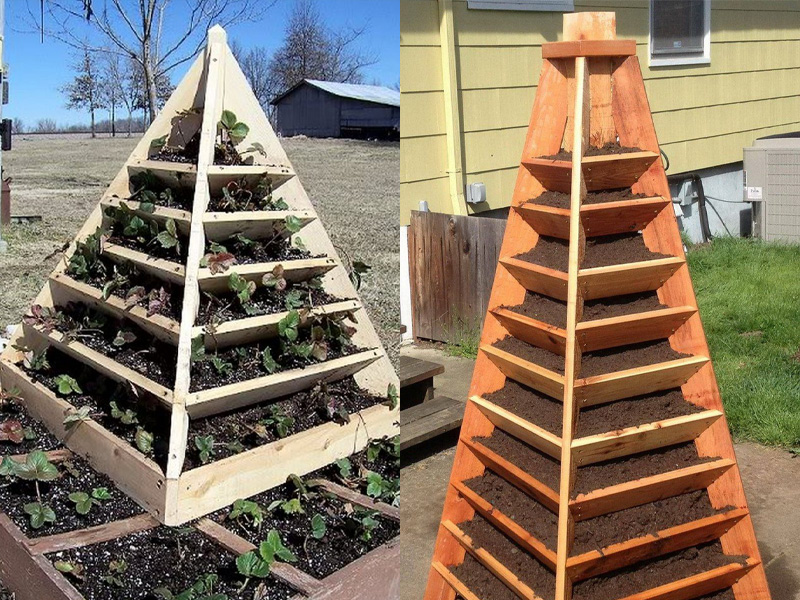
Photo Credit: Owner Builder Network
Frequently Asked Questions About Strawberry Pyramids
How many strawberry plants can I fit in a pyramid?
It depends on the size of your pyramid. A standard three-tier pyramid on a 4×4 foot base holds about 20 to 25 plants. Larger designs with more tiers can accommodate 50 or more. The tall six-tier tower design from Fine Gardening can hold up to 90 plants in the same footprint that would require 60 feet of traditional row planting.
What type of strawberry is best for a pyramid planter?
Day-neutral varieties like Albion, Seascape, and Tristar are the best fit for pyramid planters. They stay compact, produce fewer runners, fruit continuously through the season, and give you berries in their first year. Everbearing varieties like Quinault and Ozark Beauty are also solid choices.
How often do I need to water a strawberry pyramid?
Strawberries need about 1 to 1.5 inches of water per week, and up to 2 inches when flowering and fruiting. Pyramids dry out faster than in-ground beds, especially on the upper tiers, so check soil moisture every couple of days and water when the top two inches feel dry. Drip irrigation on a timer makes this much easier to manage.
Do strawberry pyramids need to be winterized?
Yes, if you live where temperatures drop below about 20°F. The exposed soil in a pyramid gets colder than in-ground beds. Apply 6 to 8 inches of clean straw mulch after the plants have gone dormant in late fall, and remove it gradually in spring once about 25 percent of the plants show new growth.
How long will a wooden strawberry pyramid last?
A pyramid built from cedar or redwood will typically last 10 to 15 years or more depending on your climate. The wood will weather and gray over time but will remain structurally sound. The strawberry plants themselves should be replaced every three to four years as their productivity declines.
Should I pinch off flowers the first year?
For June-bearing varieties, yes — remove all flowers during the entire first season so the plant focuses on building strong roots. For day-neutral and everbearing varieties, pinch off the first flush of flowers for about the first six weeks after planting, then let them fruit for the rest of the season.
Can I grow other things in my strawberry pyramid?
Absolutely. Herbs like thyme, chives, and parsley make good companions and can fill any gaps on your tiers. Some people dedicate one side or tier to flowers like marigolds or alyssum to attract pollinators. Just avoid planting anything that will shade out or outcompete your strawberries.